If you’ve been wondering how to send documents using DocuSign recently, you’ve come to the right place.
Nowadays, many individuals and organizations have made the switch to eSignature solutions and are enjoying the many benefits of introducing a streamlined new process to their file-sharing workflow.
DocuSign is one of the leaders in the eSignature market due to its very accessible platform, which allows users to send documents digitally via an ‘envelope’ efficiently.
Not too dissimilar to the physical paper envelopes that would be used to encase documents, the DocuSign envelope securely transports your files without having to worry about printing, mailing, and waiting for your recipient to let you know they’ve received the post. Not only does this new digital way of sharing documents dramatically cut down on time spent managing physical copies, but you’ll also be able to reduce errors, improve client relations, and introduce effective new workflows.
So let’s take a look at some of the ways your organization could send a document digitally:
- An employment contract
- A credit application
- A registration form
- Subscription Agreements
- A rental lease
- A sales contract
Through DocuSign, you’ll be able to collect information and signatures, generate invoices, route unique signing paths, take payments, and finalize agreements with the click of a button. If you’re new to DocuSign and would like to learn more about how to send a document for electronic signature, check out our comprehensive guide that will get you up to speed in 5 easy steps.
Step 1:
The first step of the envelope preparation process is to upload your documents to your DocuSign account. Unlike emails, there is no size limit for each file, and you can add as many files as you want. You can even attach files that don’t need to be signed or filled out; they will simply be displayed in the envelope.

Step 2:
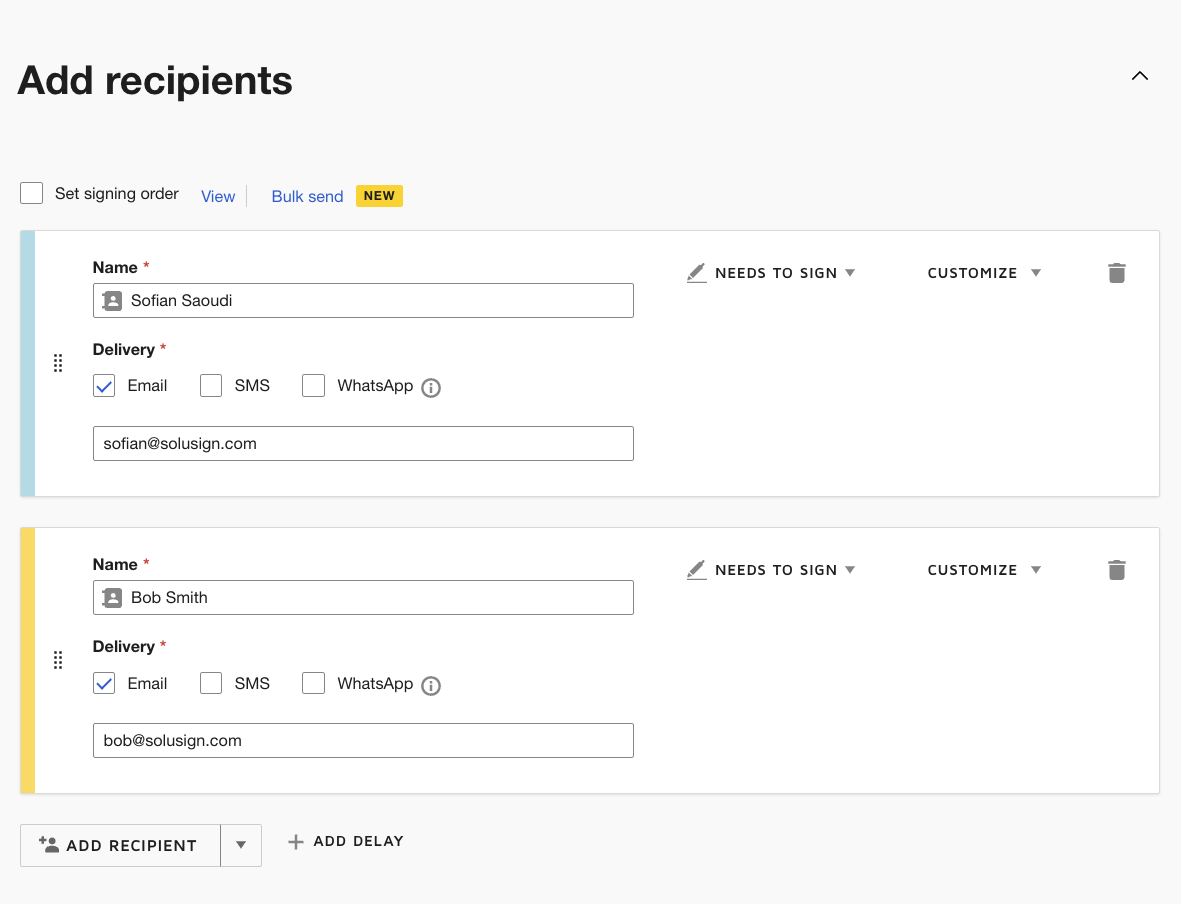
Next, you’ll need to tell DocuSign where you want your envelope to go by including one or multiple recipients. You’ll be able to add a recipient and assign them a role, telling DocuSign whether you want that individual to receive or act on the document.
There are many ‘roles’ you can choose from, and DocuSign always assigns the ‘needs to sign’ role to all signers by default. For example, you and the client will need to sign the document. However, an additional recipient, like an accounts team member, won’t need to act. In that instance, you will assign a non-signer recipient with a ‘receives a copy’ action. Below is what it looks like:
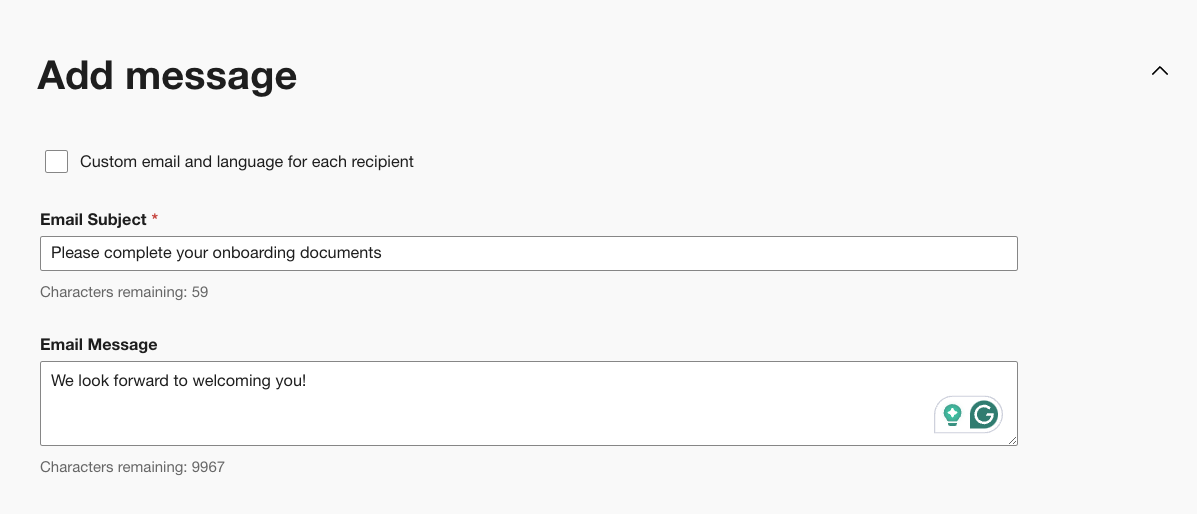
Step 3: Once you’ve included recipient information and assigned roles, you can customize your email subject and message to be included with the envelope. You can choose to display the same message for all recipients or customize it for individual recipients.
Step 4: The next step in the process consists of adding DocuSign fields to your documents. Each field is assigned to a recipient and will indicate what action needs to be taken, i.e., sign, initial, and enter information. In your proposal, you will need the following fields for yourself and the client:
- Full name
- Date signed
- Title
- Signature
Depending on which recipients the DocuSign fields are assigned to, they will display different background colors so that you can easily tell who will need to act on them. In our example, we’ve got two recipients with a ‘needs to sign’ action.
Therefore all DocuSign fields are displayed in two colors, with a color set for each of them. At this point, you will also be able to route the signing order and set up restrictions.
Now that you’ve added all the fields to the document, it should look like this:
Step 5: The final step in the process involves finalizing the envelope and hitting send. Now you will need to wait until your client signs, and the envelope will automatically be returned for signature. Following this, all recipients of the envelope will receive the signed version of the proposal by email, including non-signer recipients.
Learn how to send a DocuSign envelope and more today
To learn more about how to send a document via DocuSign, our team of Solusign consultants are on hand to help you streamline your eSignature workflow.
Get in touch to discover how we can work with your organization to build templates, implement DocuSign and integrate it with your existing CRM. We can also find workflow solutions for your financial services business and give you an in-depth overview of the DocuSign features with a private workshop. If you’d like to learn more about how our DocuSign experts can offer premium services, then don’t hesitate to reach out to someone from our team today.
Contact one of our Docusign consultants today to arrange an obligation-free 30-minute strategy call.