
A Docusign PowerForm is a self-service document. Your signers access it through a link you send by email, or one they find on your website. They fill it out, sign, and click finish. The signed document lands in your inbox. Your team never touches the transaction.
This guide covers how to create a Docusign PowerForm, how to embed it on your site, and how to track submissions by source using URL parameters. It also covers the one thing most PowerForm tutorials skip: when Web Forms are the better choice, and the two specific cases where PowerForms still win.
Throughout this guide we will use one running example: a lending company that wants to streamline its loan application process. If you are new to Docusign, our Docusign for beginners guide covers the fundamentals first.
Prefer to watch? The full walkthrough is below.

Key Takeaways
- A Docusign PowerForm flips the workflow: your signer initiates the transaction instead of you.
- You need a template with the first signer’s name and email left empty, otherwise Docusign will not let you create the PowerForm.
- Docusign’s own embed code is a link, not an iframe. To render the form inline you wrap the URL in your own iframe, and Docusign discourages that for signing sessions.
- URL parameters let you prefill fields, which makes source tracking possible without creating a separate PowerForm per source.
- PowerForms charge your envelope allowance the moment a signer clicks Begin Signing, even if they abandon before finishing.
- Web Forms are the better default for most use cases. PowerForms win for URL prefill tracking and real-time formula calculations.
Table of Contents
- Key Takeaways
- What Is a Docusign PowerForm?
- Sender-Led vs Signer-Led Workflows
- How to Create a Docusign PowerForm
- How to Embed a PowerForm on Your Website
- How to Prefill a PowerForm via URL (Source Tracking)
- PowerForm vs Web Forms: Which Should You Use?
- How Docusign Charges for PowerForms
- FAQs
- Conclusion
What Is a Docusign PowerForm?
A Docusign PowerForm is a self-service version of a Docusign template. Instead of you creating an envelope and sending it to a named recipient, you generate a shareable link. Your signers open that link whenever they are ready, enter their own name and email, complete the fields, and sign.
The completed envelope arrives in your inbox as a signed PDF. You can open it, download it, and process it like any other Docusign envelope.
The practical difference is who starts the transaction. That distinction changes the shape of your entire intake process.
Sender-Led vs Signer-Led Workflows
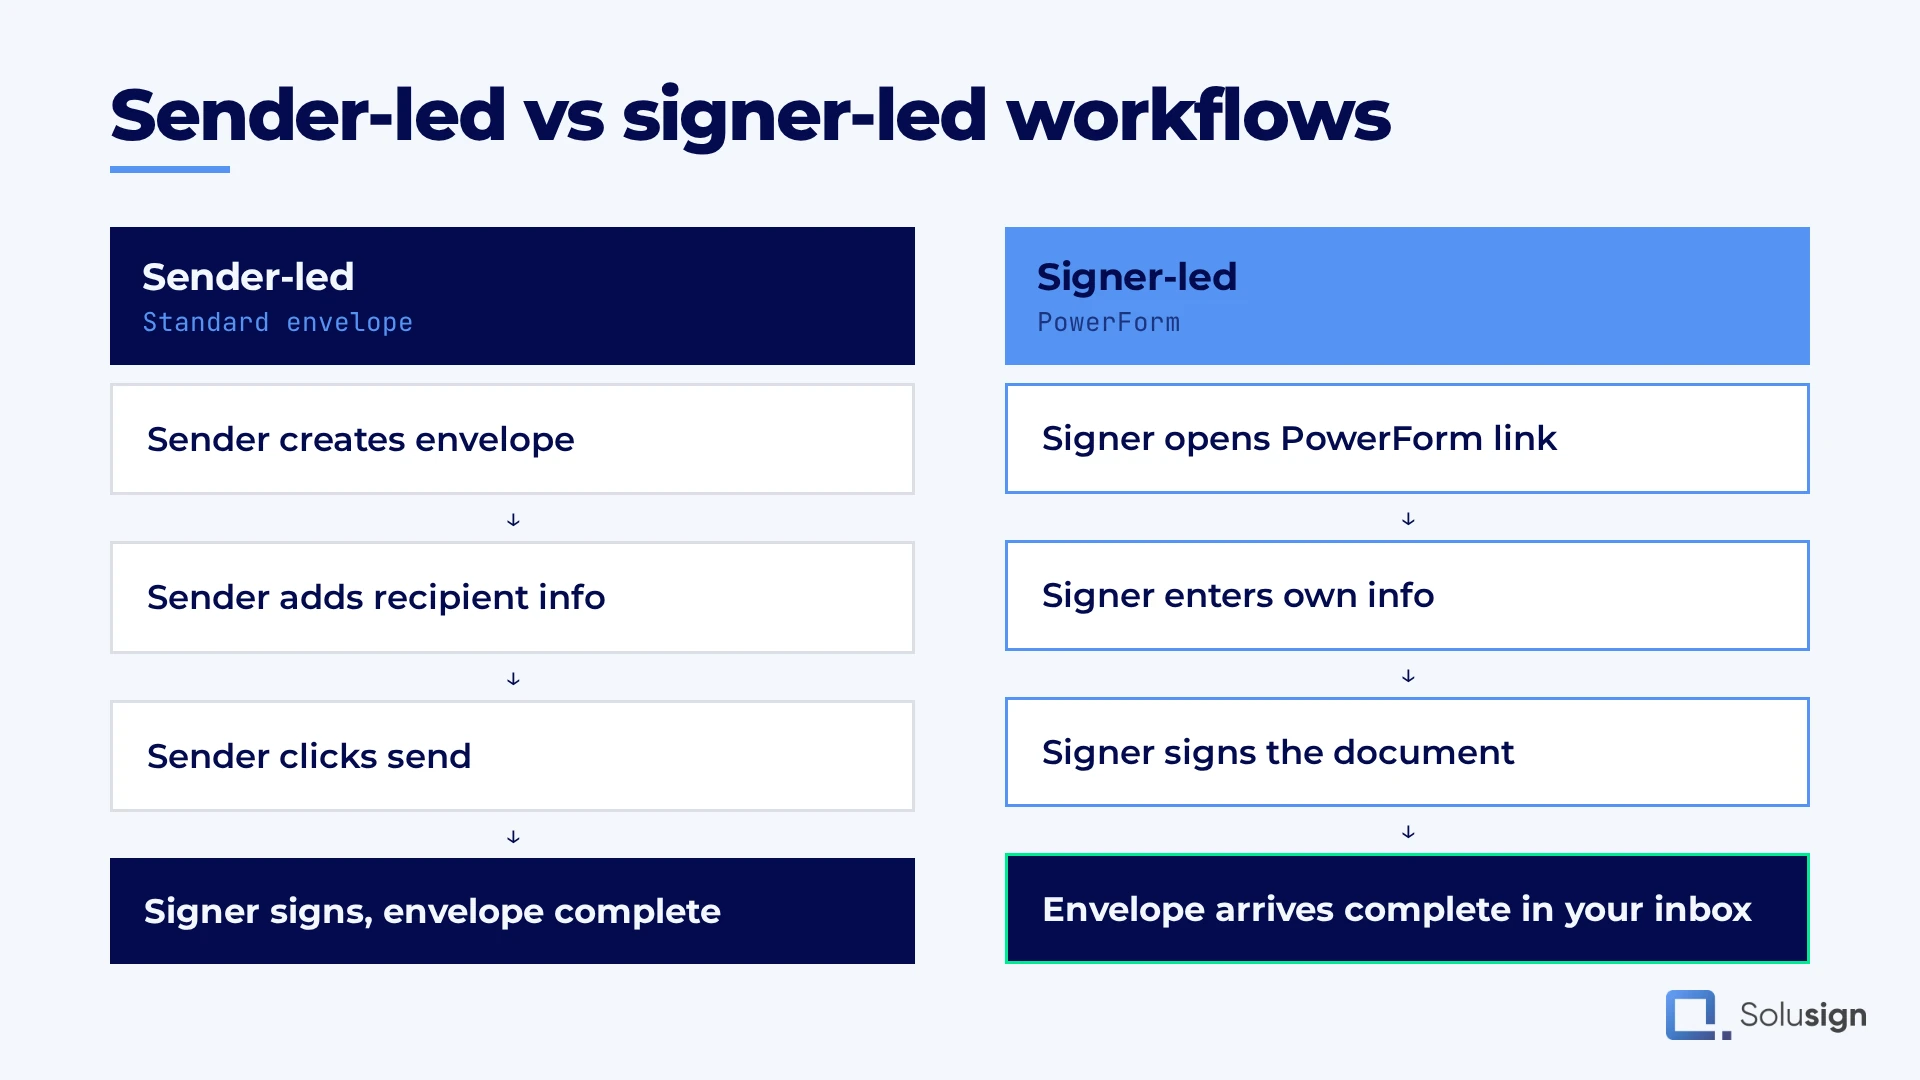
In a sender-led workflow, you log into Docusign, choose the template you want to send, click Use, enter the name and email of the signer, and click Send. That works, but you are the bottleneck. Nothing happens until you act. If you are sending to many known recipients at once, Docusign bulk send solves that side of the problem. A Docusign PowerForm solves the other side, which is collecting signatures from signers you cannot name in advance.
With a Docusign PowerForm, you host the link where your signers can find it. For a lending company, that means the loan application PowerForm is embedded on the website. Applicants land on the page, find the form, enter their own name and email, sign, and the completed PDF arrives in your inbox.
This is exactly the workflow we built for a fintech in the US that was collecting about 200 loan applications a month across the US and Canada. If you are running a high volume data intake process and want help designing and implementing something like this, you can book a consultation with our team.
How to Create a Docusign PowerForm
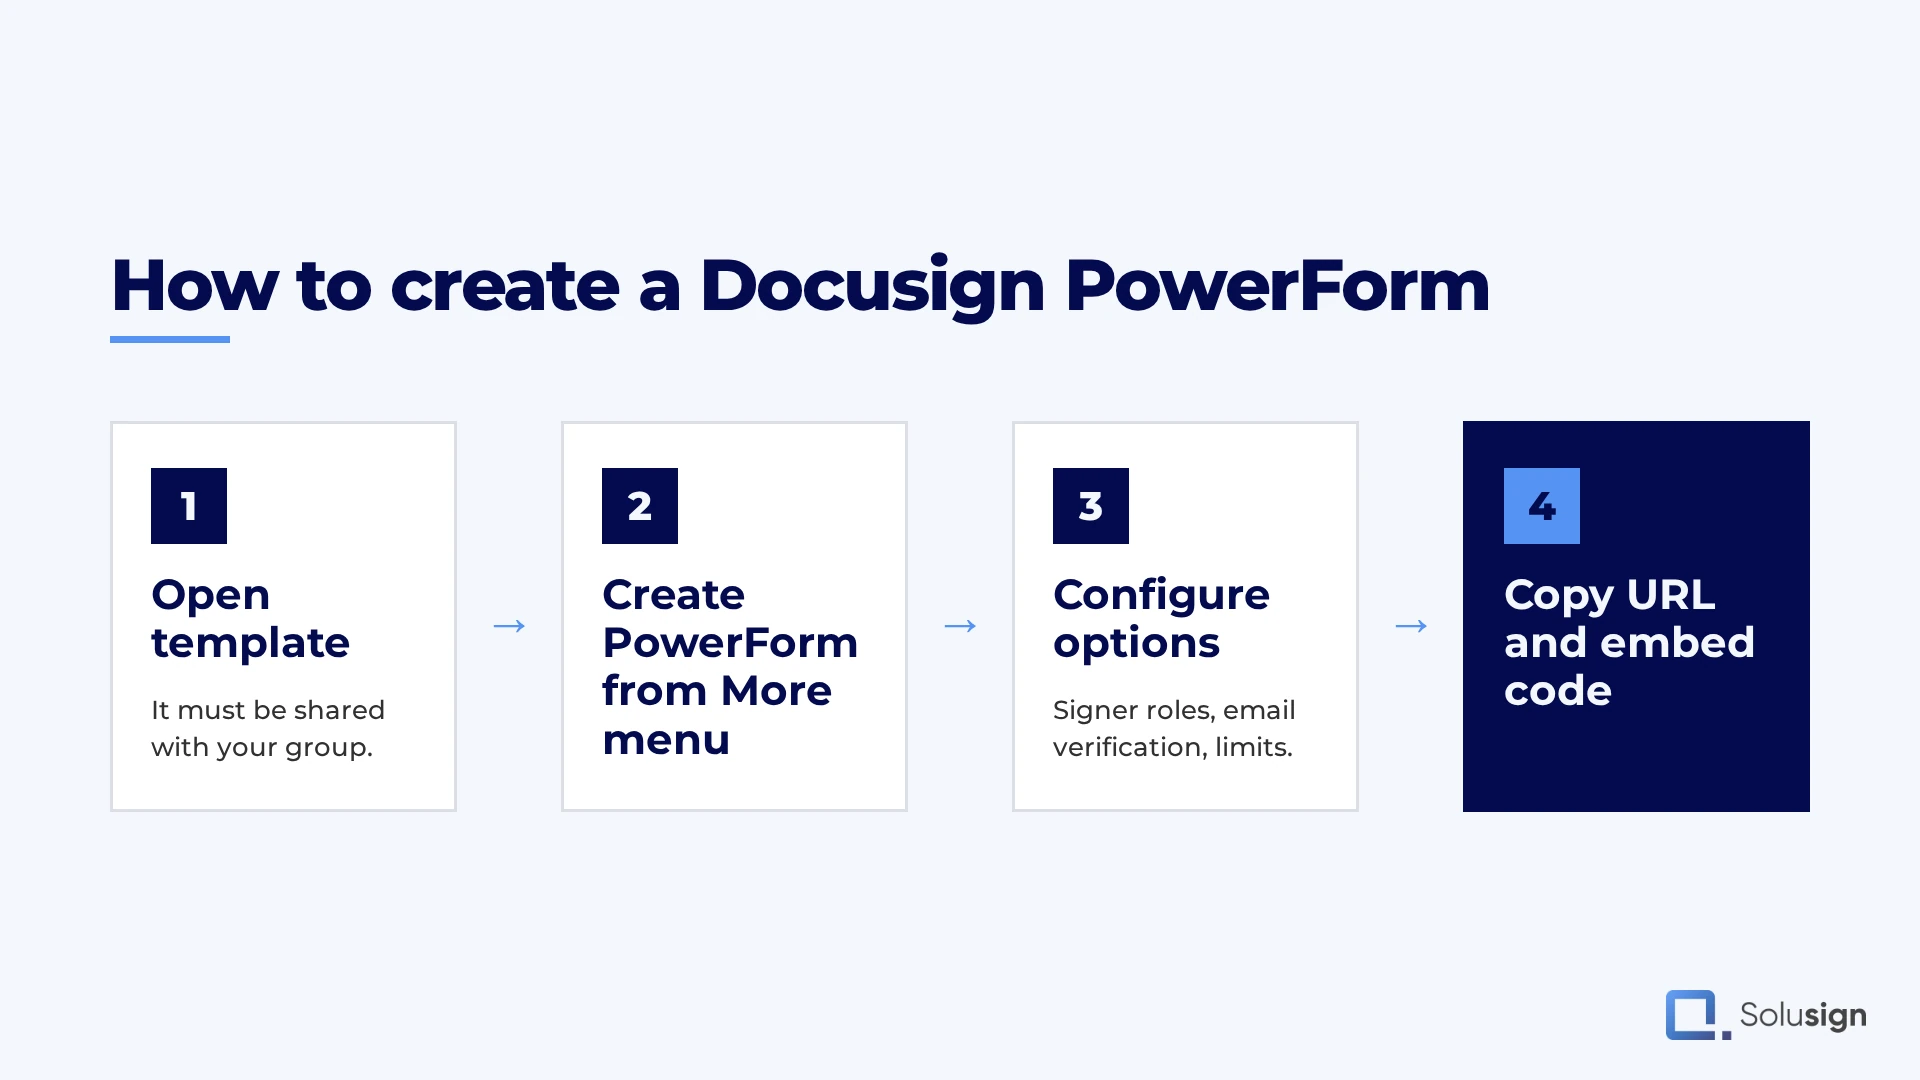
The first thing you need is a Docusign envelope template. If you need a refresher on building one, we have a full guide on how to make and send Docusign templates. Docusign’s own Create and Use PowerForms documentation covers the account permissions you need.
In our loan application example, the template has one document and two signers: the main applicant and the co-applicant.
Important requirement: the first signer’s name and email fields must be left empty on the template. If they are populated, Docusign will not let you create the PowerForm. This is the most common reason people hit the “cannot create a PowerForm from the selected template” error.
Once your envelope template is ready:
- Click the three dots on the template
- Choose Create PowerForm
- Customize the email subject and the instructions for the first recipient
- Click Create
Docusign gives you two things: a public URL you can share by email, and an embed code you can use to place the Docusign PowerForm directly on a website.
How to Embed a PowerForm on Your Website
There is a misconception worth clearing up first, because almost every tutorial gets it wrong. When you create a Docusign PowerForm, Docusign hands you two things: the PowerForm URL, and an embed code. That embed code is not an iframe. It is an HTML anchor tag, a hyperlink or button that sends your visitor to the Docusign-hosted PowerForm page.
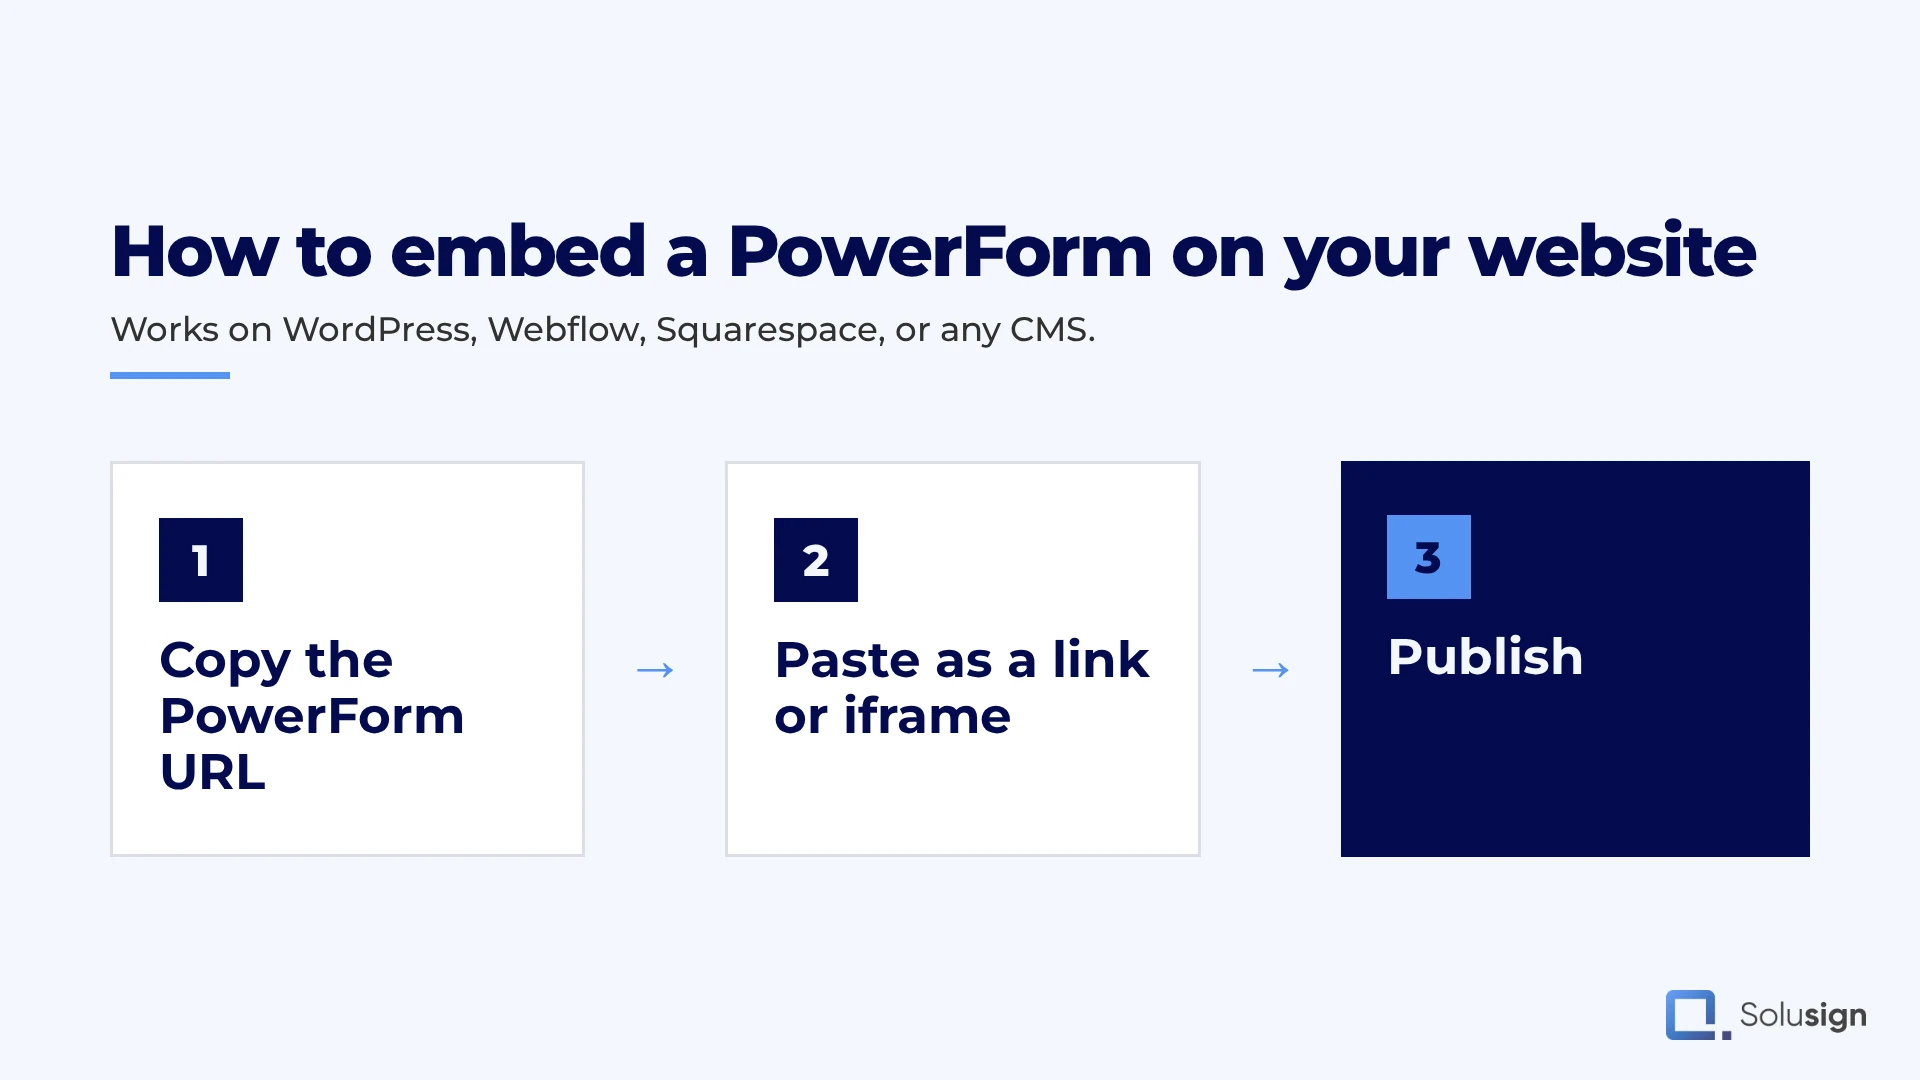
So the native option is a link, not an inline form. If a button on your page is enough, that is the simplest and safest route. Add an HTML block, paste the code, publish.
If you want the form to render inline so your visitor never leaves your site, you have to wrap the PowerForm URL in your own iframe. Decide which page it will live on, add an HTML code block, paste your iframe, then swap in your own Docusign PowerForm URL. This works on WordPress, Webflow, Squarespace, or any platform that accepts custom HTML.
Before you do, understand the trade-off. Docusign publicly discourages iframes for signing sessions in their own developer guidance, and their reasoning is worth knowing:
- The OAuth security standard prohibits iframes, as set out in RFC 6819 section 4.4.1.9.
- Your signer cannot see the Docusign URL, so they have no way to confirm the destination is legitimate. That is exactly the signal people are trained to check for phishing.
- Iframes expose the page to clickjacking and cross-frame scripting.
- Some features do not work inside an iframe at all. Identity Verification is the one that catches people out.
- Browser vendors keep tightening iframe rules, so an embed that works today can quietly break later.
In practice, for a low-risk intake form like a loan application, the inline iframe is common and the convenience usually wins. For anything involving identity verification, payments, or regulated agreements, use the link and keep the signer on Docusign’s domain where they can see it. Developers building a fully native experience should skip both and use Docusign’s JavaScript focused view instead.
Either way, you share the URL of your own page rather than the raw Docusign link, which keeps the experience on brand.
How to Prefill a PowerForm via URL (Source Tracking)
This is the part that turns a Docusign PowerForm from a convenience into an actual reporting tool.
Say your lending business works with 20 different brokers. Each broker works with their own clients and refers applicants to your financial products. You need to know which application came from which broker, because you pay commissions.
The obvious approach is to create a separate PowerForm for each broker. That means 20 PowerForms to build and maintain, plus a new one every time you onboard a broker.
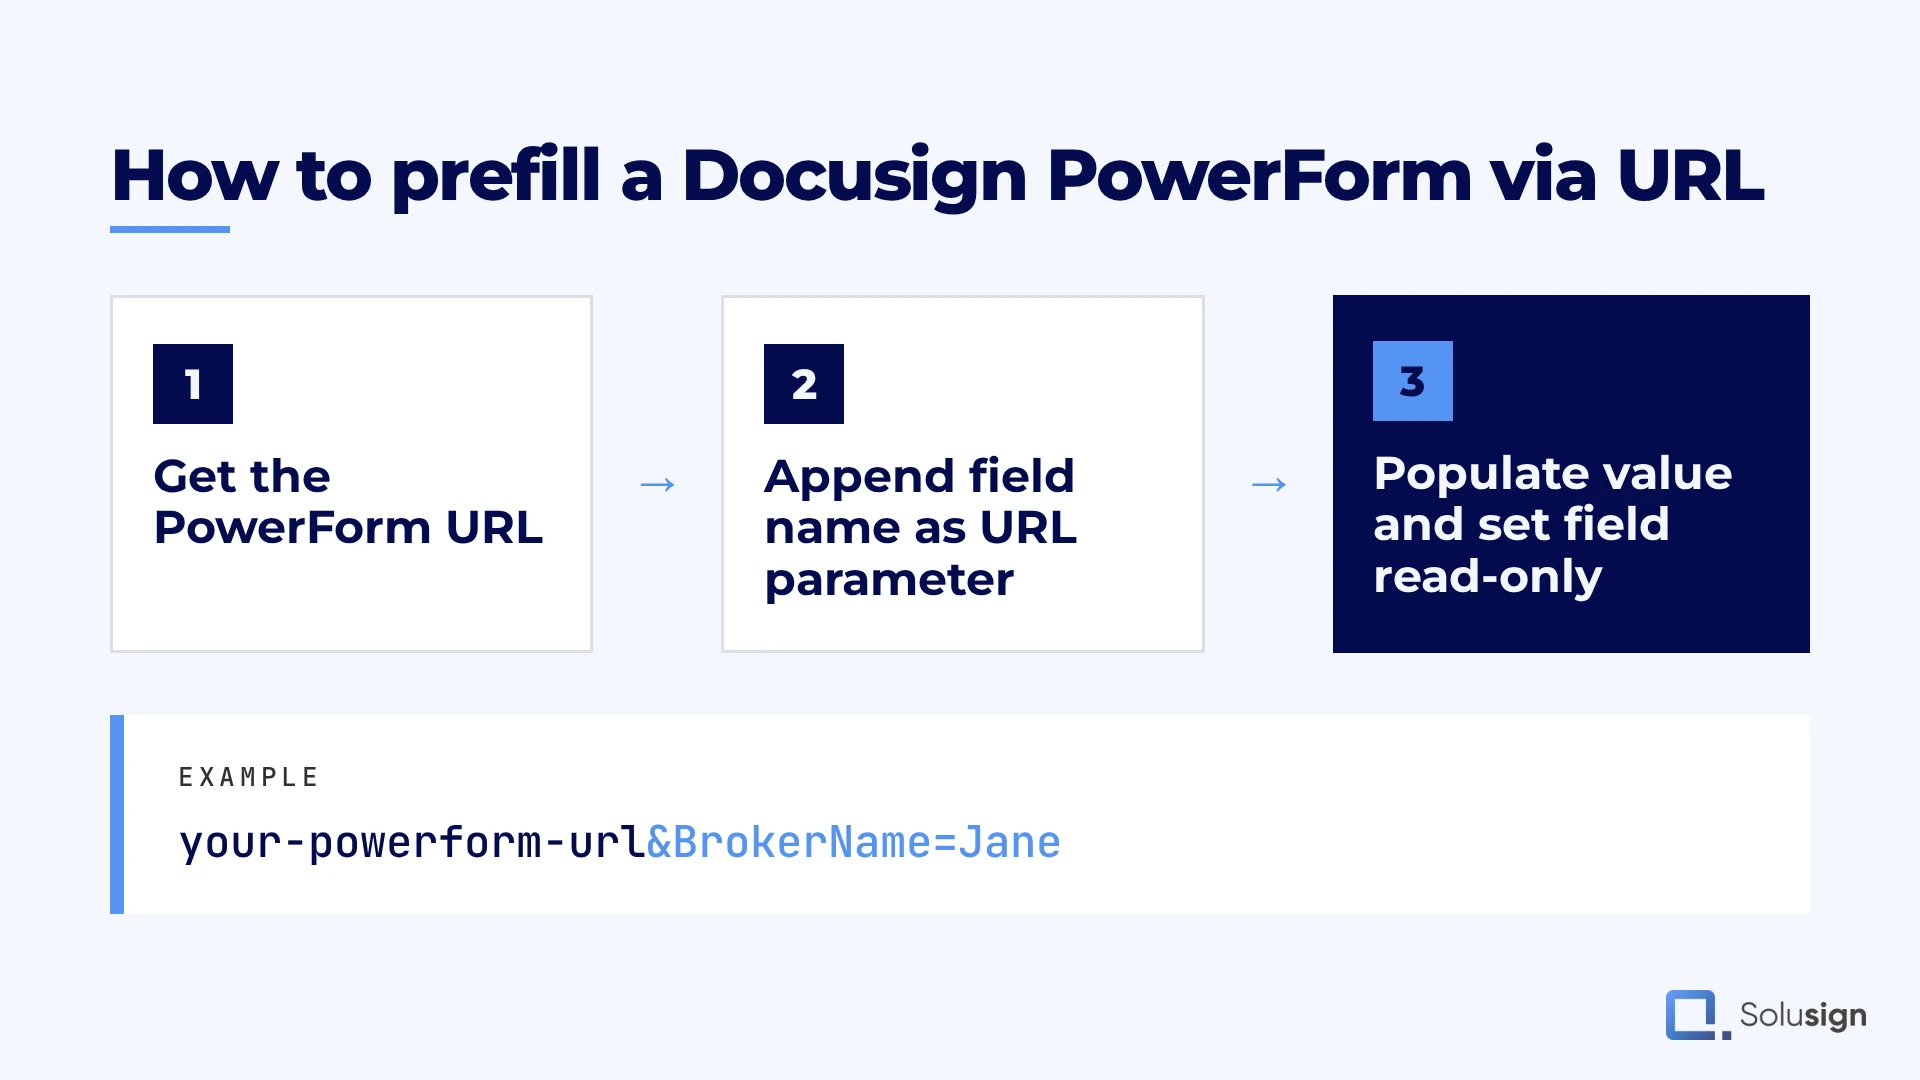
The better approach is to append the broker name to the PowerForm URL as a parameter. Here is how:
- Copy the PowerForm URL from Docusign
- Append the field name as a URL parameter, using an ampersand and an equals sign
- Add the value for that broker
In our loan application template there is a field called broker. So the URL becomes something like your-powerform-url&broker=Jane.
Share that URL with Jane. Jane shares it with her clients. Every submission through Jane’s link is tagged with her name on the envelope. You can hide the field from the signing view entirely if you do not want applicants to see it.
To pull the data: go to Agreements > PowerForms, locate your PowerForm, and click Download. The CSV shows every submission with the broker name attached, so you can identify the origin of each application and pay commissions correctly.
This is the kind of attribution architecture we design for clients who pay commissions or need to track submission sources. If that is your situation, book a call with our team.
PowerForm vs Web Forms: Which Should You Use?
Before you build your Docusign PowerForm, you should know that Docusign has another product called Web Forms. For most use cases, that is what we recommend to clients. We have a separate guide on the Docusign Web Forms prefilling tool if you want to go deeper.
Web Forms typically win when:
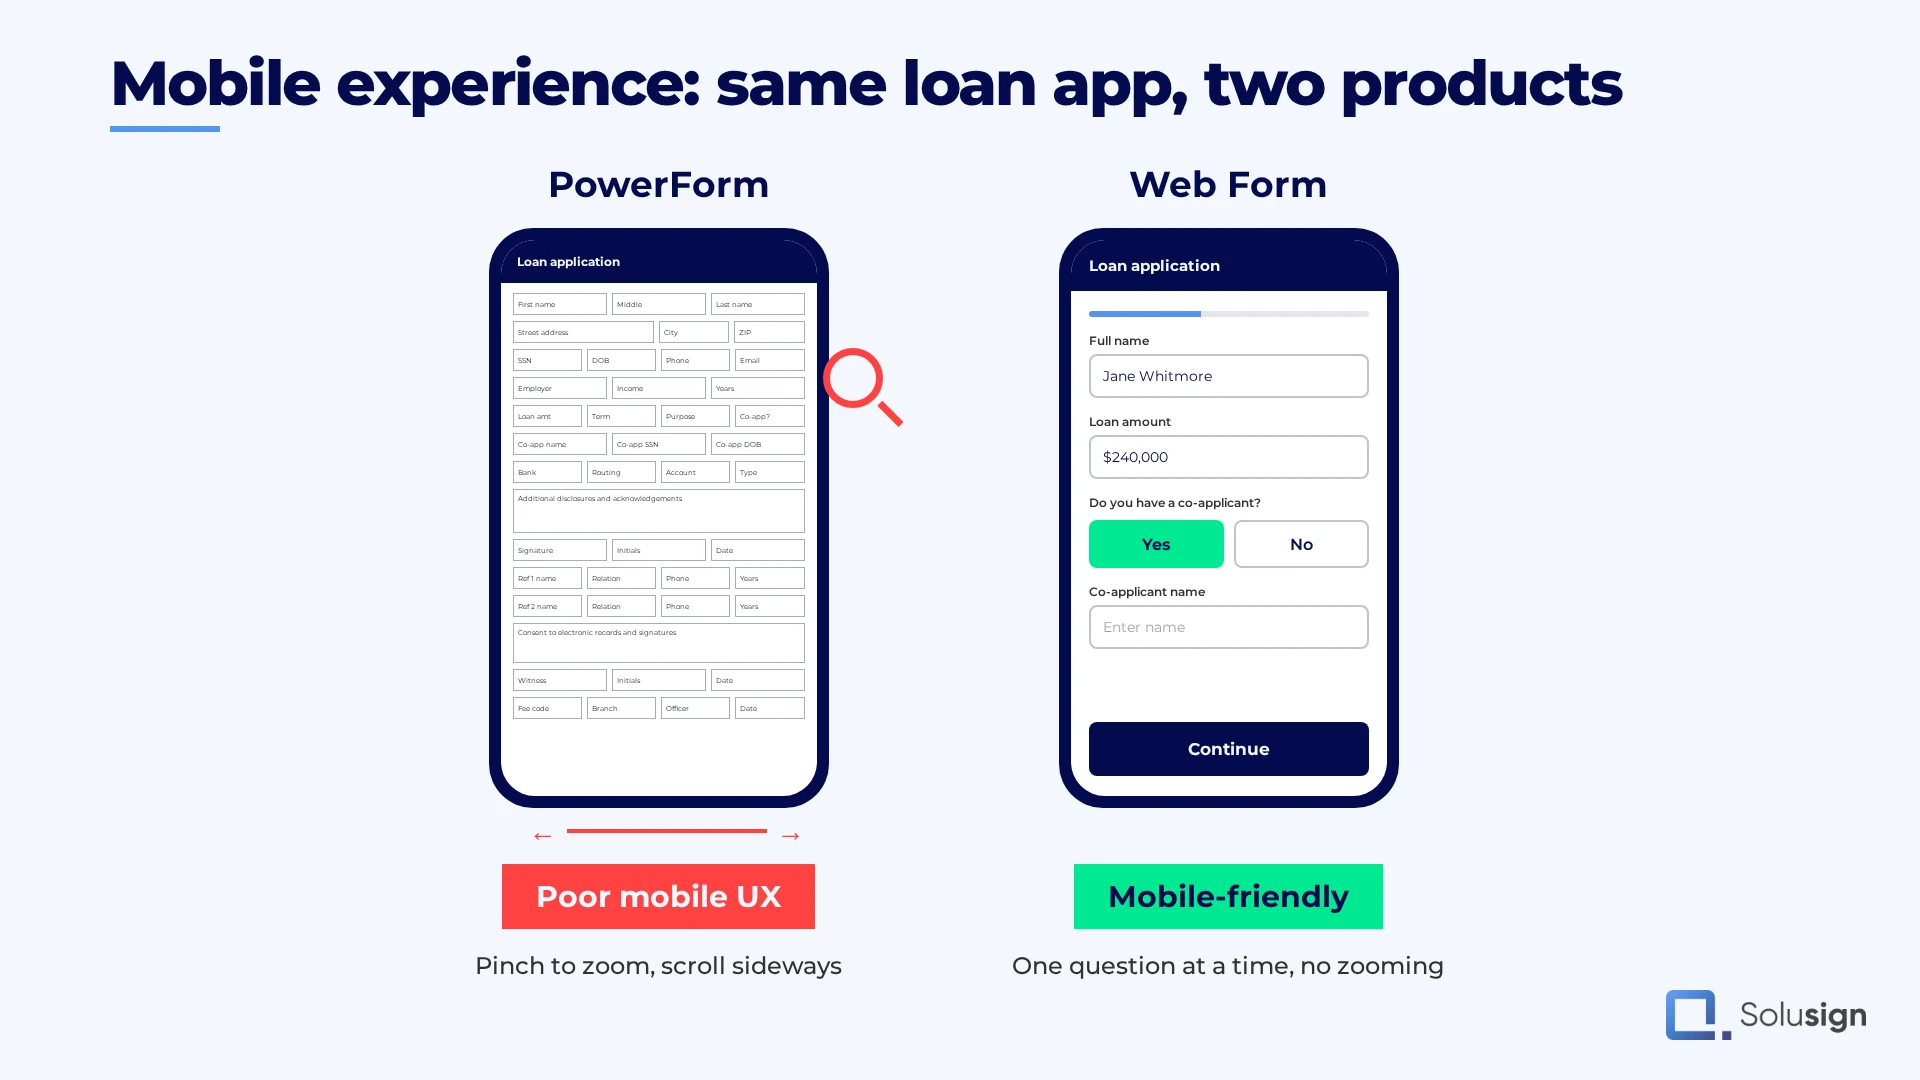
- You need a mobile responsive experience. Web Forms are natively mobile responsive. One question at a time, no zooming, no horizontal scrolling.
- You have sections that need to be hidden based on previous answers. In our loan application, a PowerForm cannot hide the spouse fields from a solo applicant, because PowerForms show the fields directly on the document. Web Forms hide the underlying document and only show the fields that are active. If you would rather handle this inside the document itself, that is what Docusign conditional logic fields and conditional sections are for. Choose “individual” and you get one applicant’s fields. Choose “joint with another person” and the second applicant’s fields appear.
- Cost efficiency matters. More on this below.
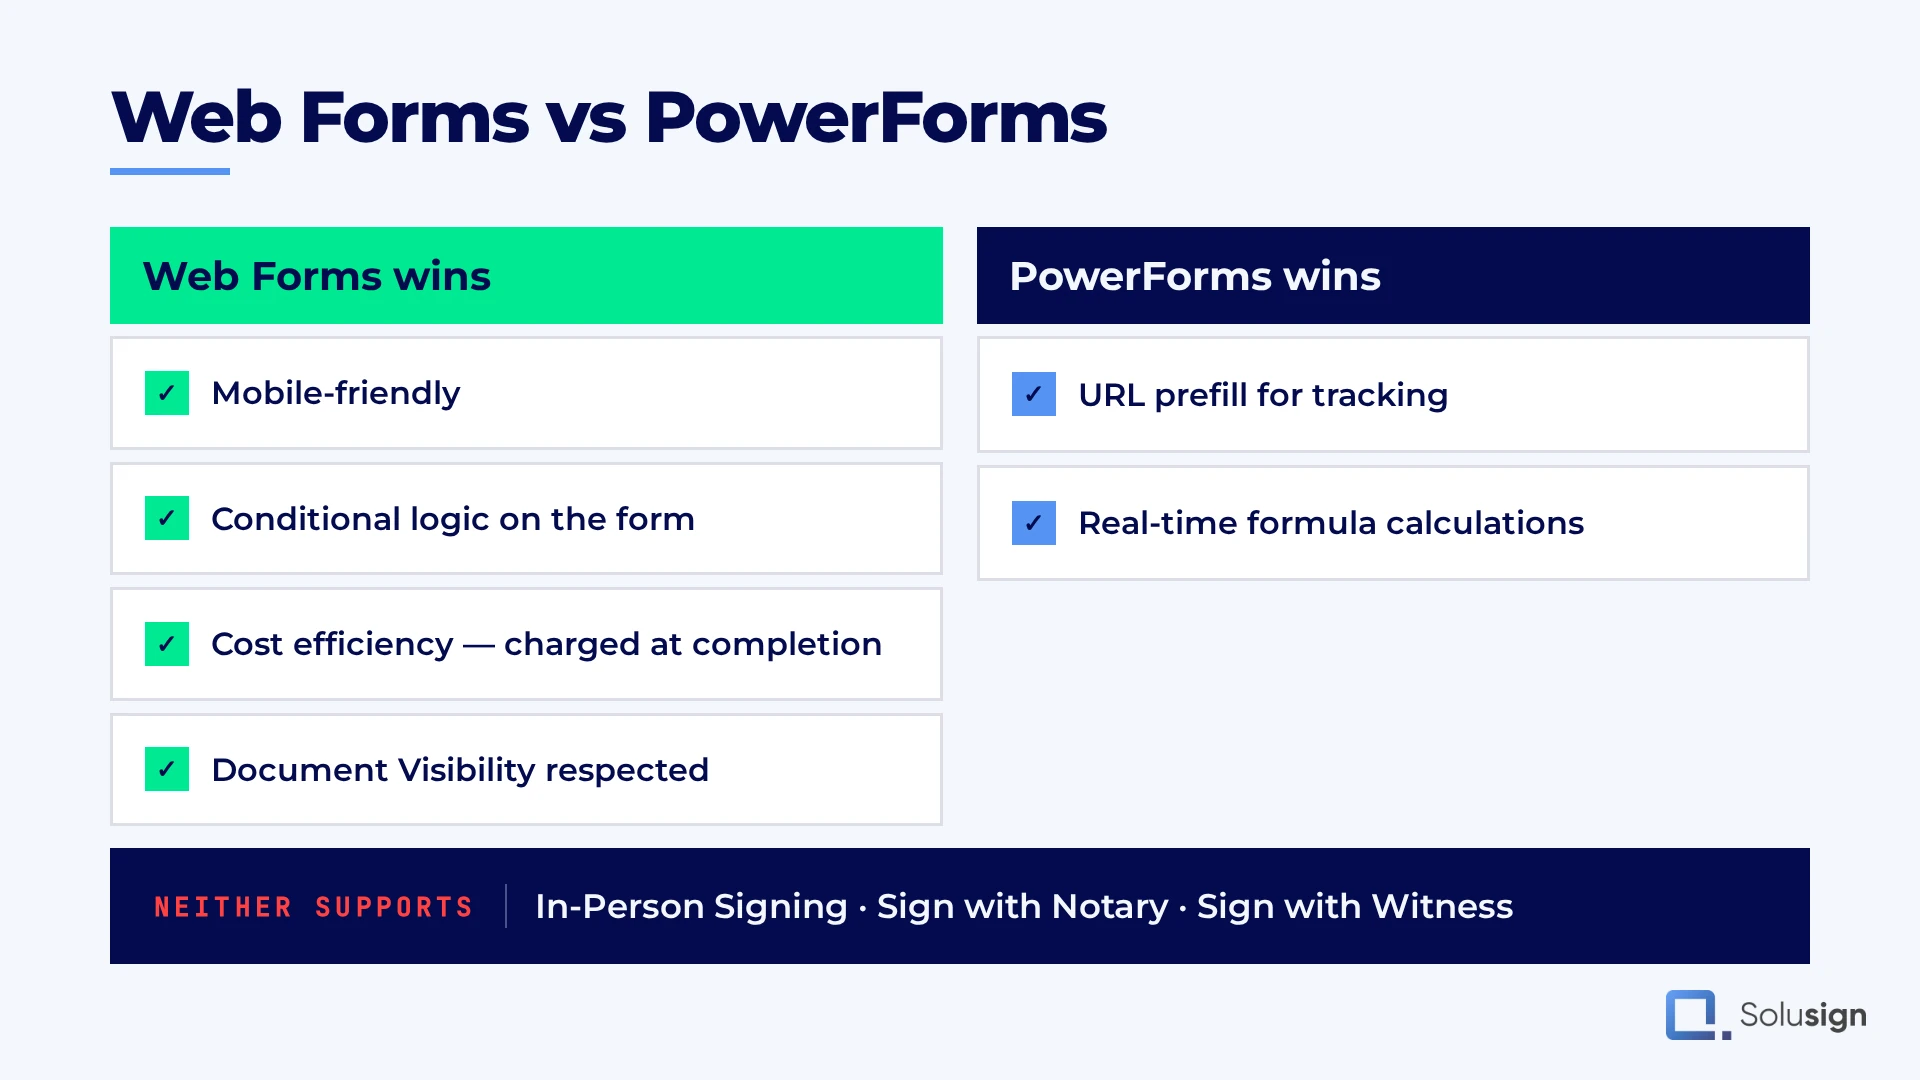
PowerForms win in two specific cases:
- Dynamic links with locked tracking data. The ability to create a link on the fly that the signer cannot change, carrying tracking information in a field, only works with PowerForms.
- Real-time formula calculations. Web Forms do not calculate formulas in real time. If your form contains amounts or dates that need to be calculated so signers can review them before signing, PowerForms handle that.
How Docusign Charges for PowerForms
This part surprises a lot of teams.
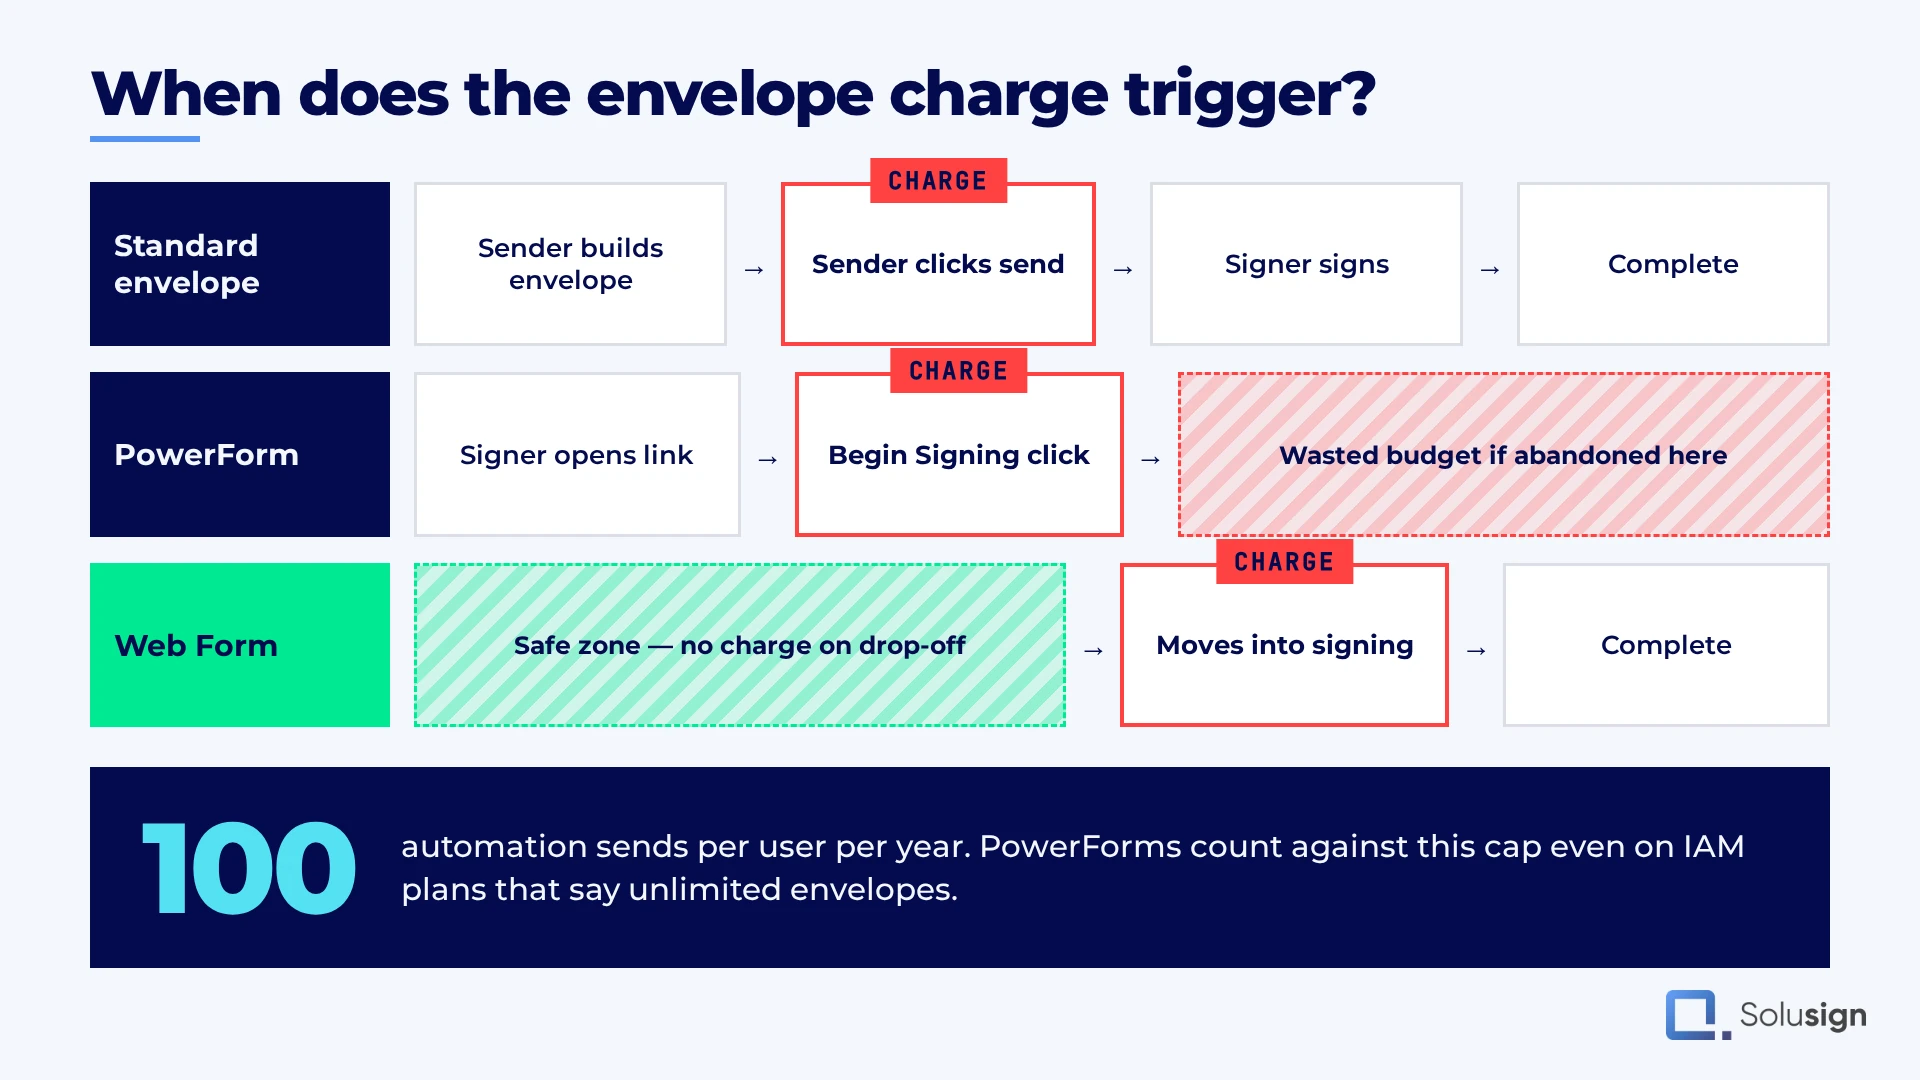
With a Docusign PowerForm, you are charged as soon as the signer clicks Begin Signing. Not when they finish. Not when they sign. The moment they enter their name and email and click through, one envelope comes out of your allowance.
That means if a signer drops out before clicking Finish, you still paid for that envelope. Worse, if their signing session expires or times out, they will likely start a new PowerForm, and you pay for that transaction too.
Web Forms have a safe zone. The charge happens after the signer has filled out all the fields and clicked Finish. Drop-offs during form-filling cost you nothing.
There is one more thing worth knowing. Docusign charges on a per-envelope basis for all automated sends, and a PowerForm counts as an automated send. So even if your plan is marketed as unlimited envelopes, that means unlimited manual envelopes sent from the Docusign website. It does not include PowerForms or Web Forms.
You get 100 envelopes per user per year in your plan for automated sends, and an overage fee applies beyond that. We covered the full pricing model in our Docusign pricing guide.
FAQs
What is a Docusign PowerForm?
A Docusign PowerForm is a self-service version of a Docusign template. You generate a shareable link, and your signers open it, enter their own name and email, fill out the fields, and sign. The completed envelope arrives in your inbox without your team creating or sending anything.
Why can’t I create a PowerForm from my template?
The most common cause is that the first signer’s name and email are populated on the template. Docusign requires those fields to be empty, because the signer supplies their own details when they open the PowerForm. Clear those fields and try again.
Can I embed a Docusign PowerForm on my website?
Yes, in two different ways. The embed code Docusign gives you is an HTML anchor tag, meaning a link or button that sends the visitor to the Docusign-hosted page. To render the Docusign PowerForm inline on your own page, you wrap the PowerForm URL in your own iframe and paste that into an HTML block. Both work on WordPress, Webflow, Squarespace, or any platform that accepts custom HTML.
Does Docusign support iframe embedding?
It works, but Docusign does not recommend it. Their published guidance points to the OAuth standard prohibiting iframes under RFC 6819, clickjacking and cross-frame scripting risk, the signer being unable to see the Docusign URL to verify the destination, and Identity Verification not functioning inside an iframe. Docusign recommends redirecting the browser to the URL, or using their JavaScript focused view for a native in-app experience.
How do I track which source a PowerForm submission came from?
Append the field name to your PowerForm URL as a parameter, followed by the value. For example, if your template has a field called broker, the URL becomes your-powerform-url&broker=Jane. Every submission through that link is tagged with the value. Download the CSV from Agreements > PowerForms to see all submissions with their source.
When does Docusign charge for a PowerForm?
Docusign charges the envelope the moment your signer clicks Begin Signing, not when they complete the document. If a signer abandons partway through, you still paid for that envelope. Web Forms charge later, only after the signer finishes the form and moves into signing.
Do PowerForms count against unlimited envelope plans?
Yes. Docusign plans marketed as unlimited envelopes cover unlimited manual envelopes sent from the Docusign website. PowerForms and Web Forms are classified as automated sends, which come with an allowance of 100 per user per year, plus overage fees beyond that.
Should I use a PowerForm or a Web Form?
Use Web Forms for most cases: they are mobile responsive, support conditional sections that hide fields based on previous answers, and only charge when the signer completes the form. Use PowerForms when you need URL parameter prefilling for source tracking, or real-time formula calculations that signers need to review before signing.

Conclusion
That is the complete picture on the Docusign PowerForm. You can build one from any template, embed it on your website, and prefill fields via URL parameters to track where submissions come from.
Before you commit to PowerForms as your default, weigh them against Web Forms. Web Forms win on mobile experience, conditional logic, and cost efficiency. PowerForms win when you need locked tracking data in the URL or real-time formula calculations.
If you want help designing your Docusign PowerForm workflow, or you are weighing PowerForms against Web Forms for a specific use case, you can book a strategy session with our team. We will review your current setup and map the right approach.
Happy signing.