DocuSign’s Conditional Logic Setup Step by Step Easy Tutorial in 2024
Feb 15, 2022
In this tutorial, you will learn how to use DocuSign’s conditional logic, also called conditional fields, to display or hide specific fields based on your user selection input or selection in the form fields.
If you want to cut the learning curve, book a consultation with one of our DocuSign Experts here to build your conditional rules quickly. Otherwise, keep reading!
Using this feature can help your signers navigate through your documents, making them less likely to make mistakes when acting on your documents.
This is very handy when dealing with forms and contracts that can be filled out in different ways, and it’s also a great way to reduce document error rates.
Example time!
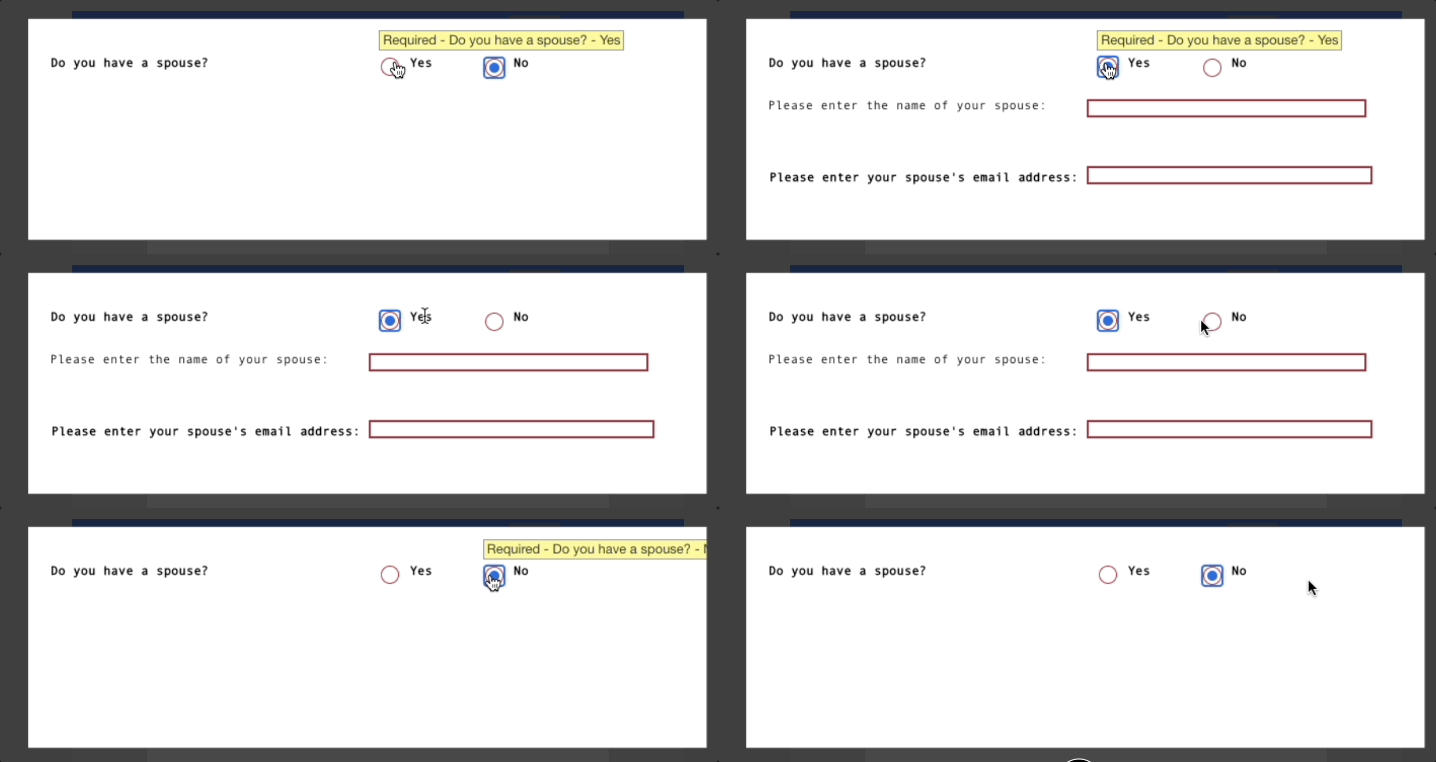
Let’s say that you’re asking the following question to your recipient:

You can use DocuSign’s conditional logic to display the text fields asking for the spouse's name and email only when ‘Yes’ is selected so that further information can be provided.
Alternatively, you could just set up the text field as ‘optional’, which would allow your recipients to skip the fields.
Instead, DocuSign’s conditional logic will ensure your signers cannot complete the envelope unless they fill out all the required fields when the option 'Yes' is selected.
But if 'No' is selected, then the required fields are hidden, allowing recipients to complete the envelope without having to complete irrelevant fields.
How to Set up DocuSign’s Conditional Logic Overview
- Choose a trigger field
- Rename the label of the trigger field (optional)
- Select which fields are to be displayed when the condition is met
- Delete or edit conditions
- Set up advanced conditions with formula fields
Step 1: Select a Trigger Field
A trigger can be applied to any of the following fields:
- Checkbox
- Radio button
- Dropdown
- Text
- Formula
Step 2: Rename the Label of the Trigger Field (Optional)
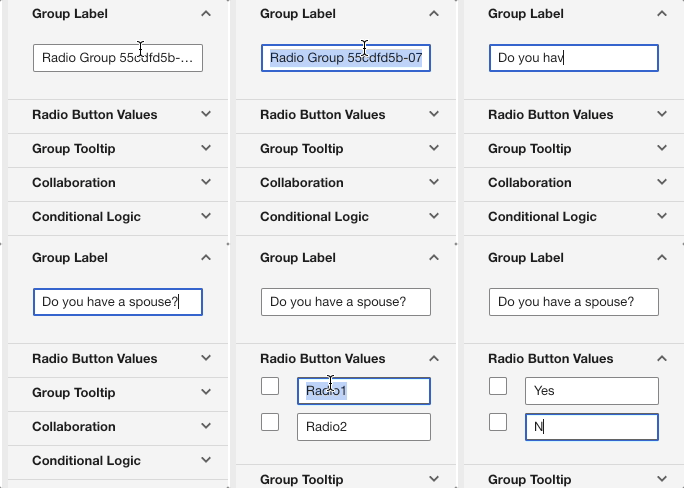
Renaming all fields is highly recommended so that you don’t make mistakes when setting up your rules. This also allows you to easily retrieve form data into a table format or integrate DocuSign with other apps, if necessary.
When a text field is selected, you can rename its labels by accessing the field’s property panel to the right of the document tagging screen.

To rename Checkboxes or Radio buttons ‘values’ labels, If you’re setting up a rule on checkboxes and Radio buttons, you should rename the label of each value.
Step 3: Setup the Rule

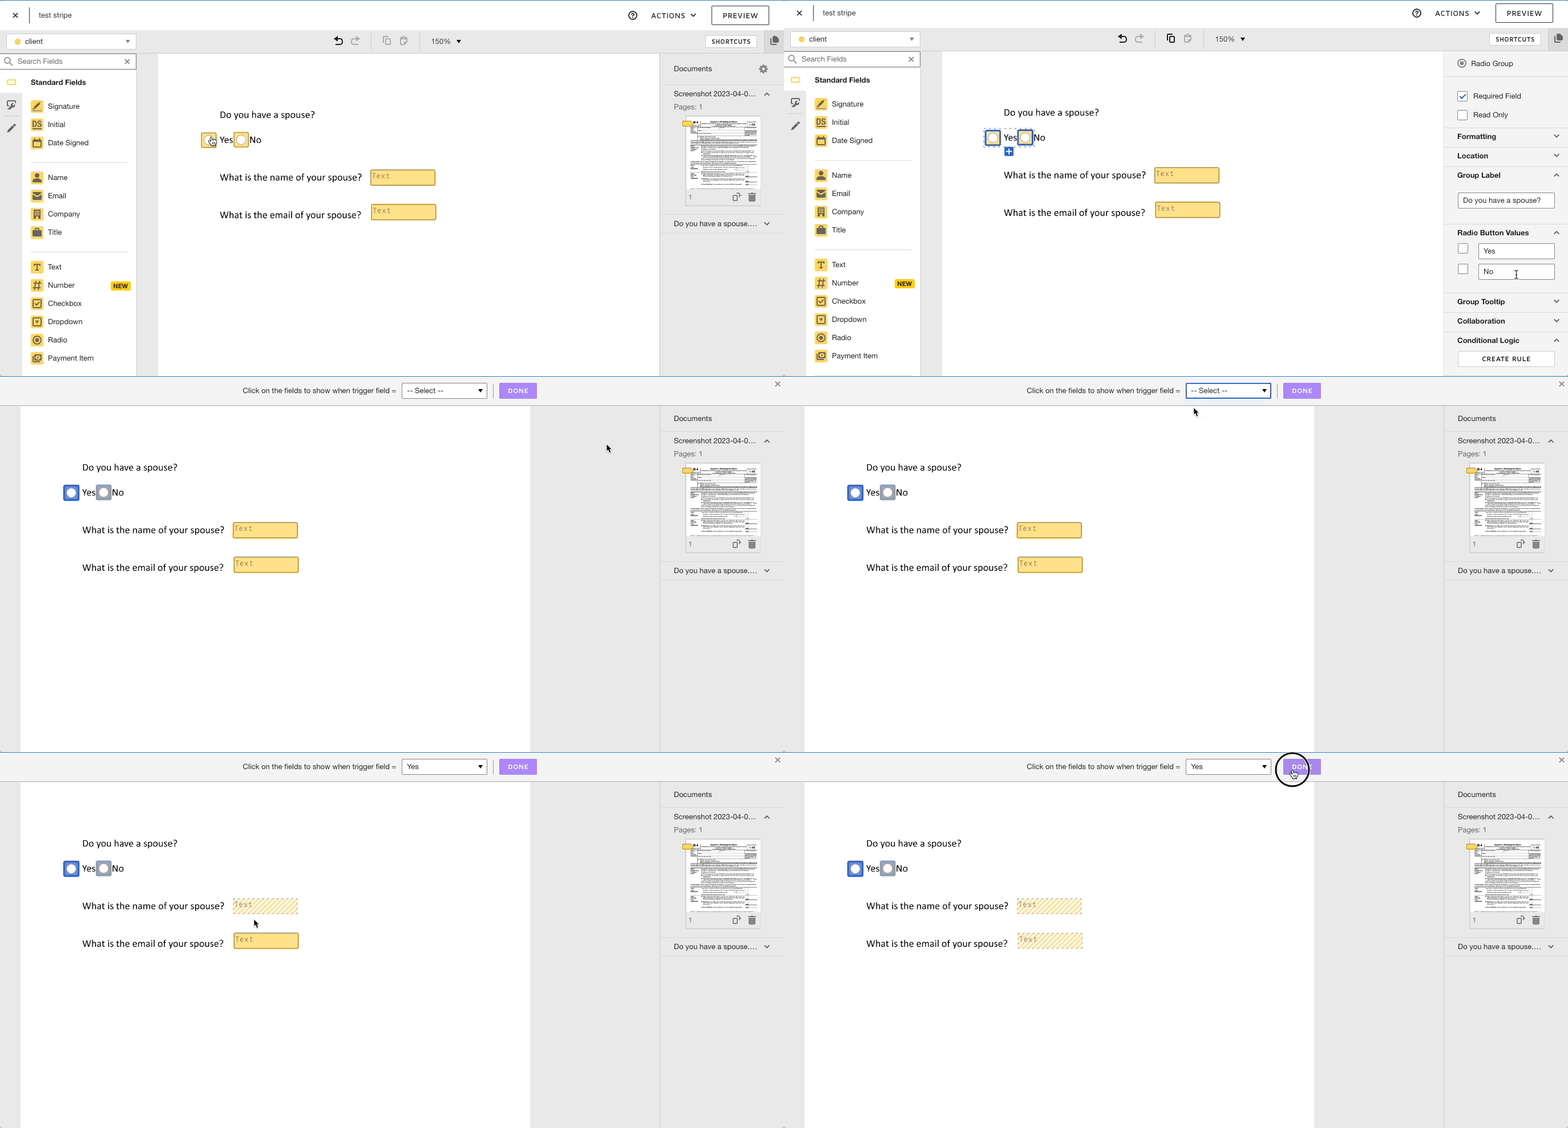
- In the properties panel, expand the Conditional Fields section and click Create Rule.
- In the rule banner at the top of the page, define the logic for your rule. In the box for your trigger field value, depending on the field type, you can set the following:
- Checkbox: Checked or Unchecked
- Radio button: Select the button Value
- Dropdown: Select the dropdown option
- Text: Enter the specific text for the field value (case-sensitive), or Select the gear icon and Choose any text
- Select the fields you want to show to the recipient when they trigger the rule.
- You can select as many fields as you like, of any type, as long as they are assigned to the same recipient as the trigger field. Selected fields are marked with a diagonal watermark to indicate they are conditional: Click Done.
Your conditional fields are defined.
The recipient only sees the conditional fields if they complete the trigger field, as defined in the rule logic.
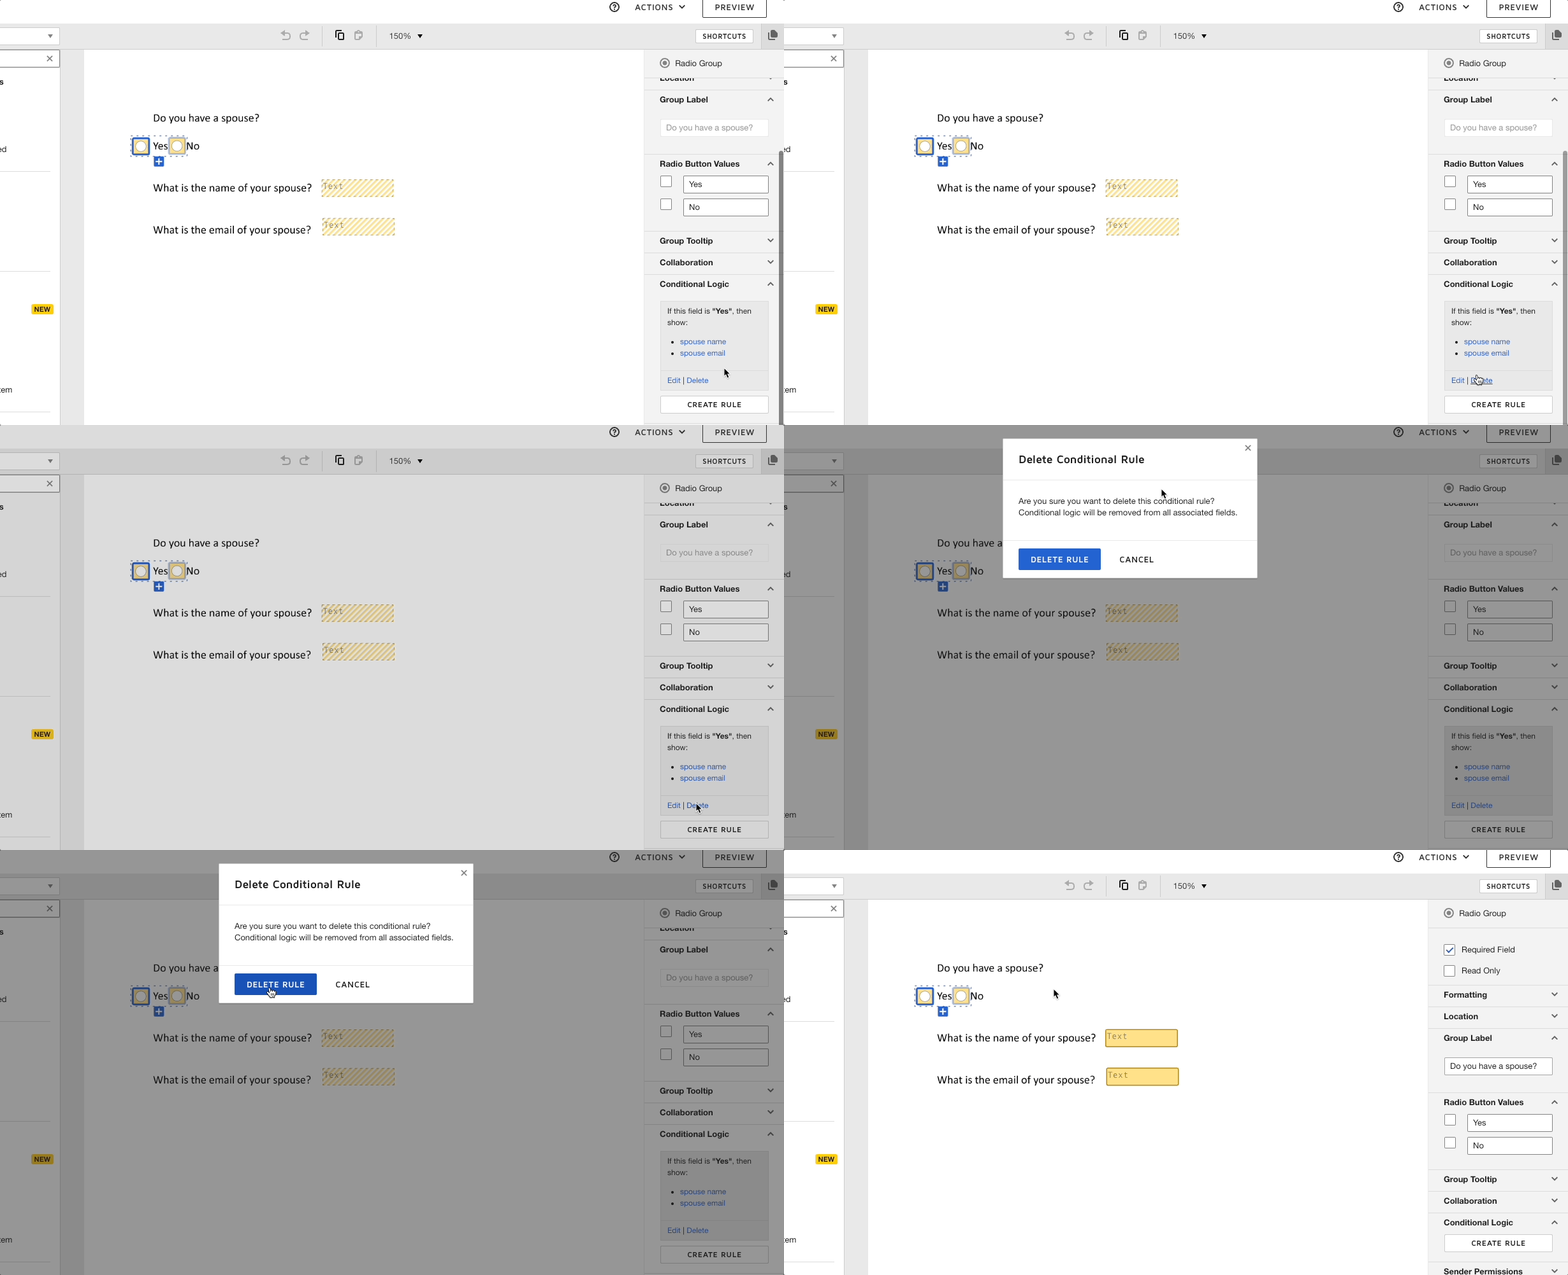
Step 4: How To Delete or Edit a Conditional Logic
Expand the Conditional Fields section in the properties panel to modify or delete existing rules.

Step 5: Setting up advanced conditions
DocuSign's standard conditional logic only allows you to set up a rule that will be triggered if one condition is met. This means you cannot create a rule that will run if multiple conditions or if ANY of multiple conditions are met.
When this occurs, use a Formula field to evaluate whether the condition(s) is/are met and set up a condition based on the result of the formula. This is explained in the video
DocuSign's conditional logic rules can be tricky to set up. If you need help setting up your rules, book a consultation with one of our DocuSign Experts here.


